Site Marker has enabled users to add in new map layers by selecting two points on a layer and matching them up with the base map. You no longer have to manually scale, rotate, or drag your layer to see if it matches!
To start, go to your project maps tab and locate "Map Layers":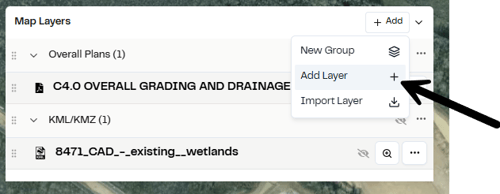
Just like a normal map layer, click on this button and select "Add Layer" from the dropdown
On this screen, drag the PDF you would like to align or click on the box to upload your file browser.
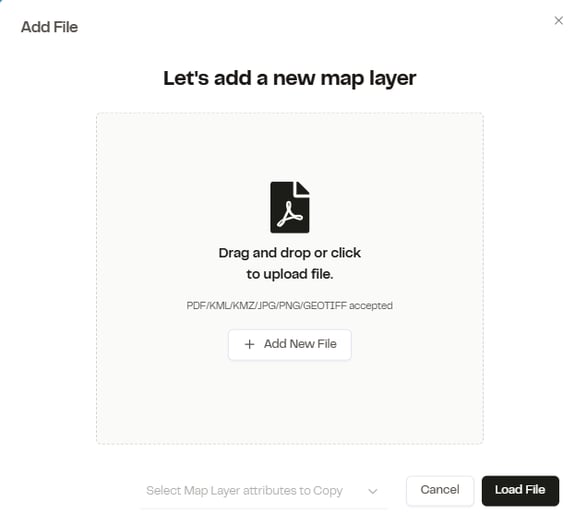
After uploading an image here, the Map Layer edit screen will pop up:
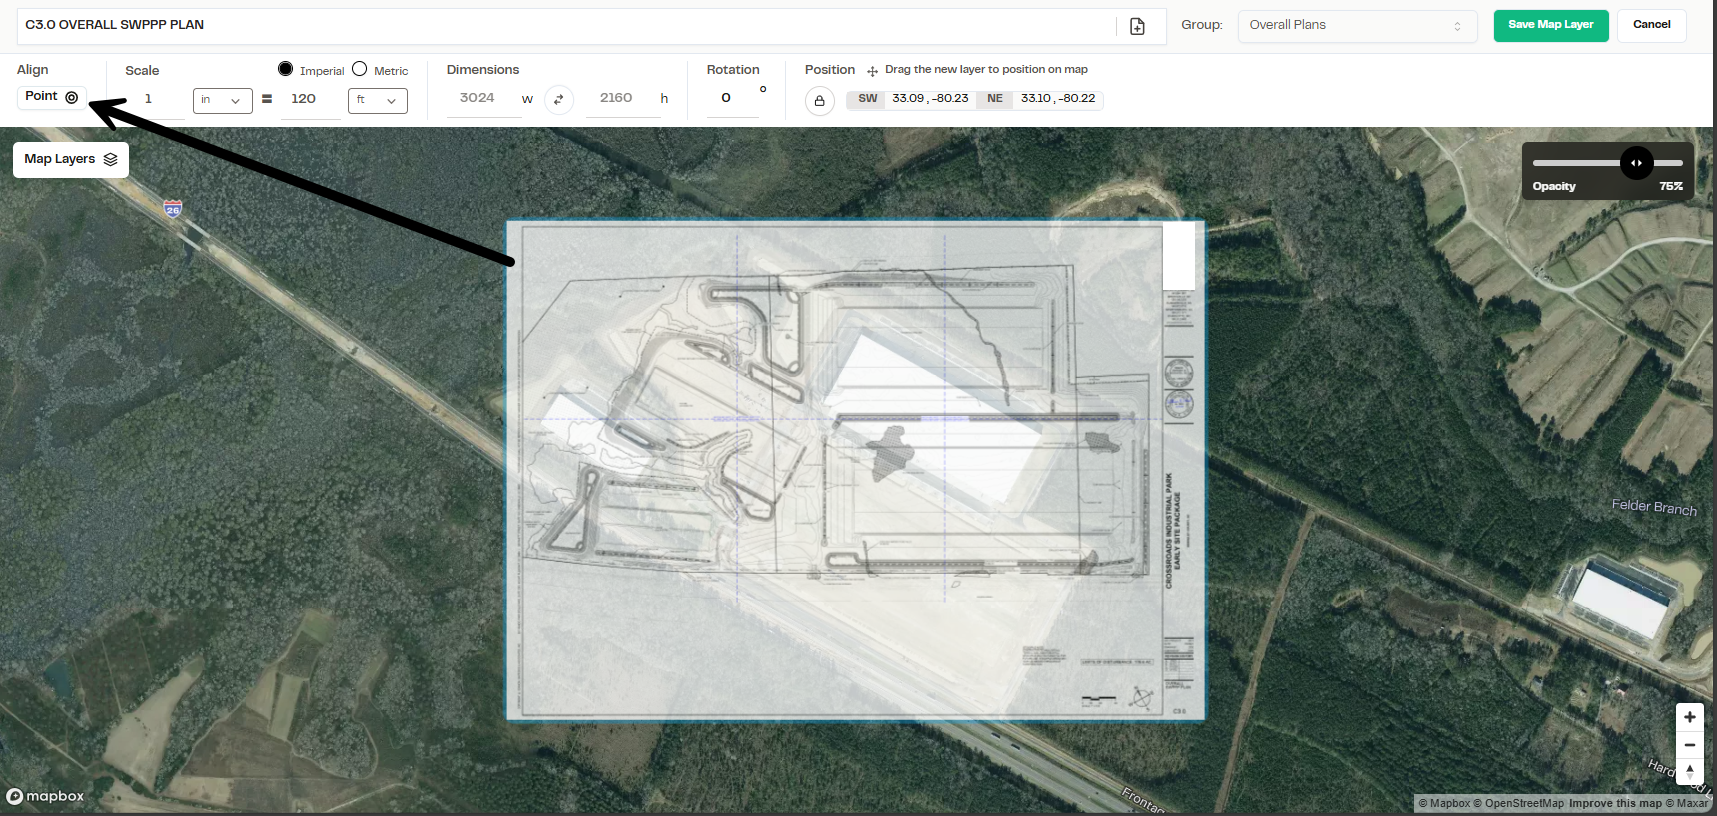
In the top left you will see a new tab called Align, and within, "Point".
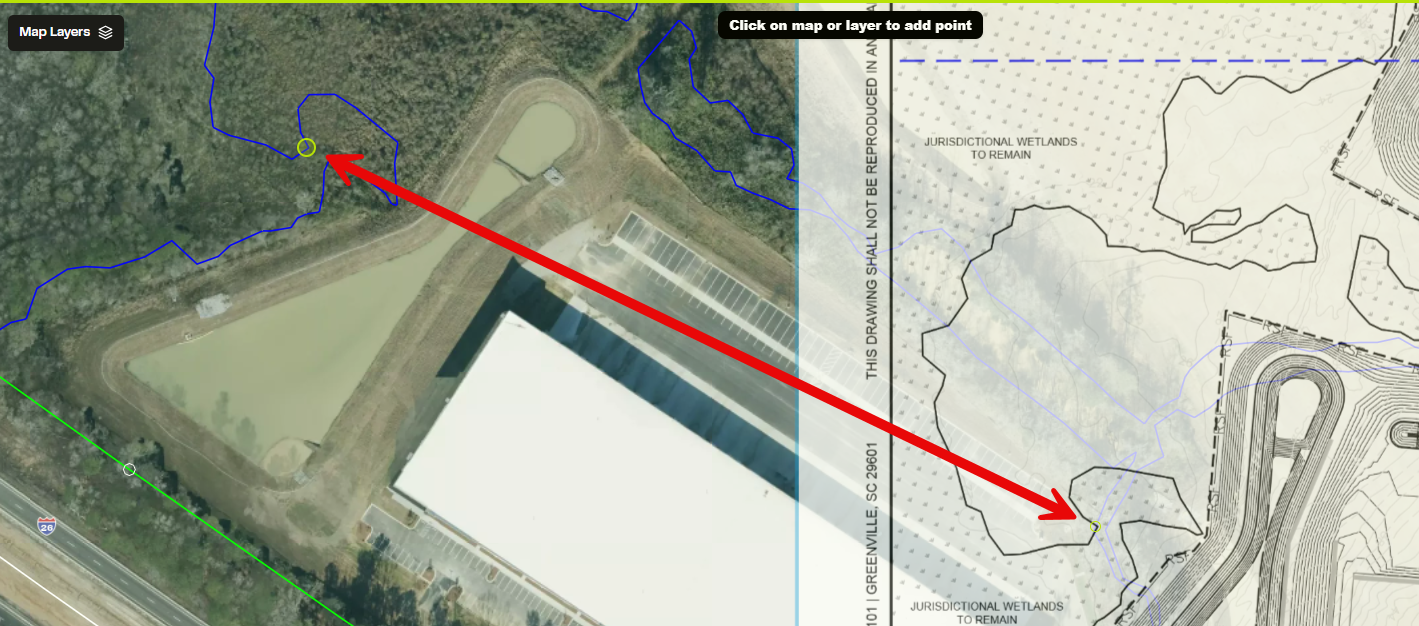
Clicking "Point" will allow you to set a point on the map layer and tie it to a point on the base map. This should be where the two points would overlap on the map.
In this situation, I will use a KML file to line up the PDF with a map, but you can use the base map or any other accepted file type to help line up the points. After turning on point mode and selecting two points there will be an arrow showing where the points align.
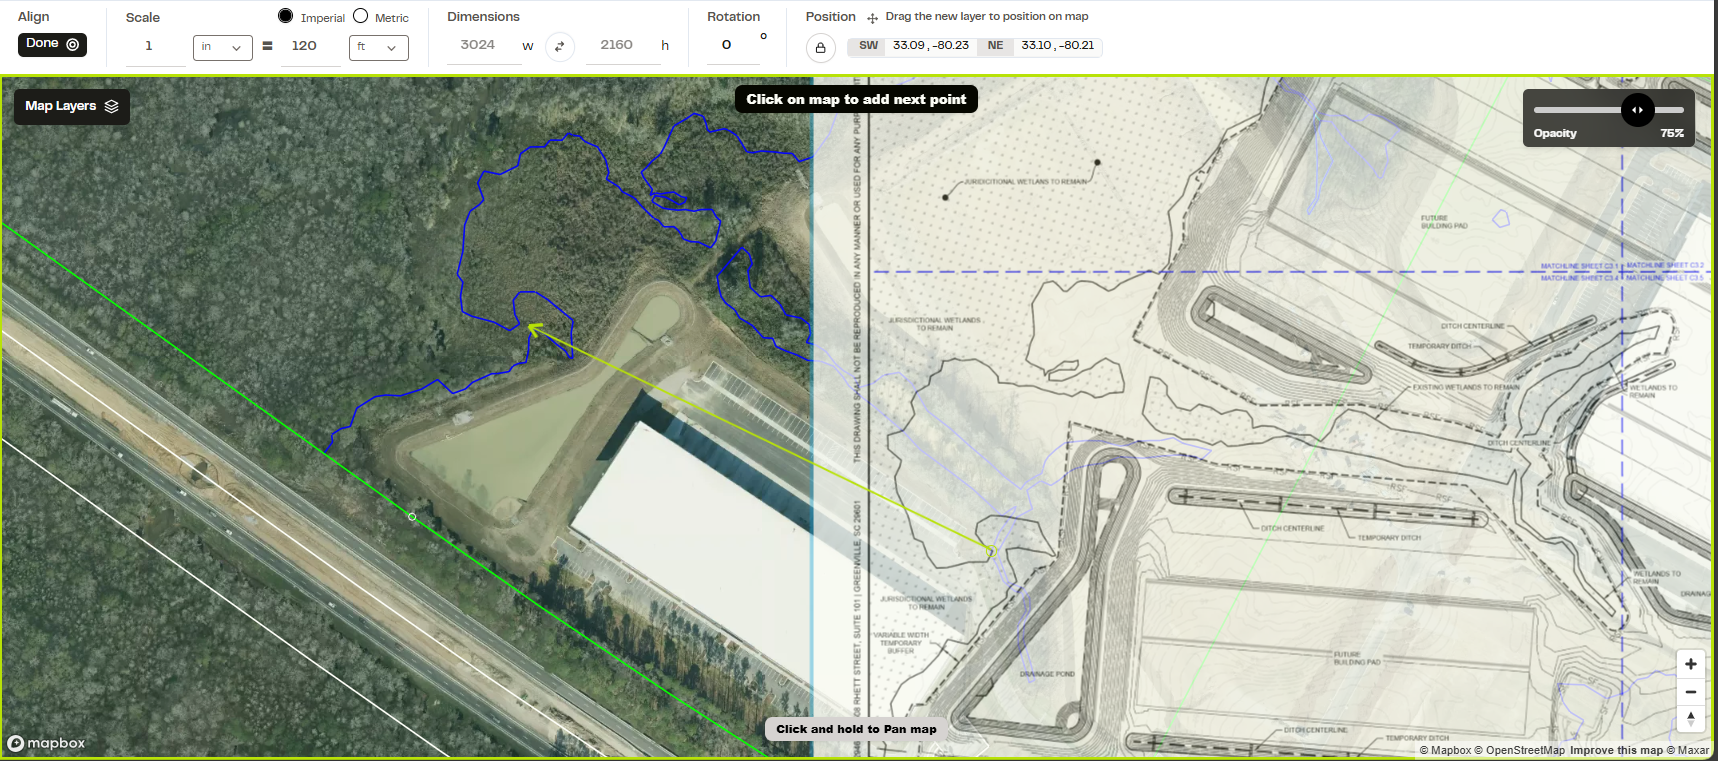
Upon clicking the second time, you will see the circles form around where the cursor selected.
Do this one more time with another location on the layer to set additional line up points. After setting the second grouping your map and layer will look like this:
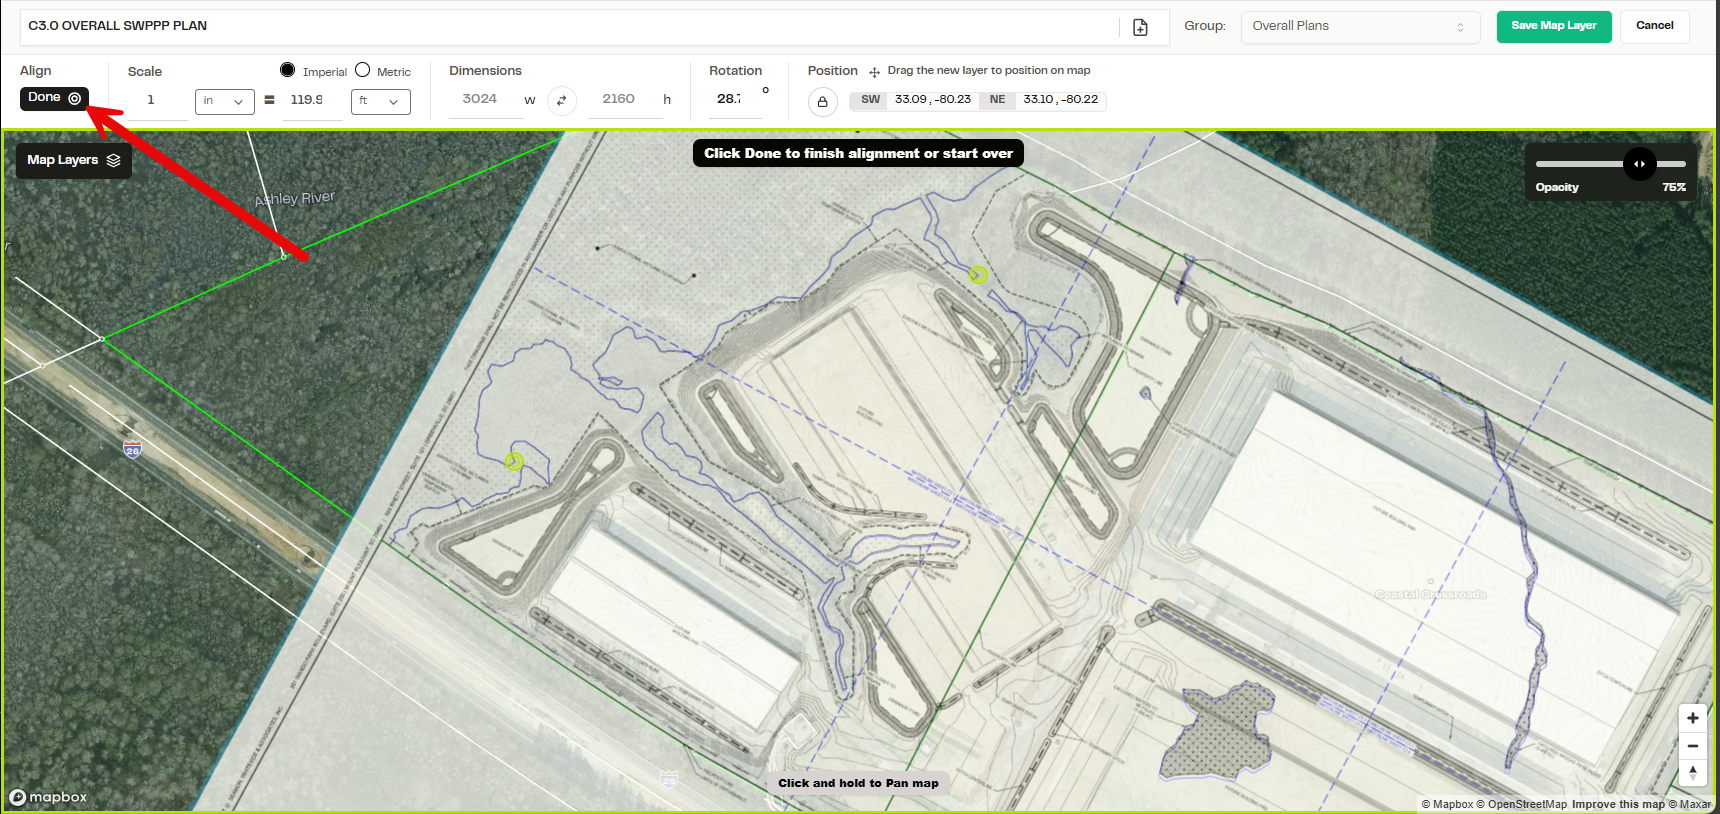
After the points are set on the map, click Done to set these points. Be careful, you can still move the map layer off of the points after clicking done. If you want to lock the layer, click on the lock icon under "Position".
Check to make sure the layer matches where you want it, and click save! It is as easy as four clicks.