Don't want to watch a video? Here you go!
Starting a project on Web
Starting a project on Mobile
Web Admin Project Creation
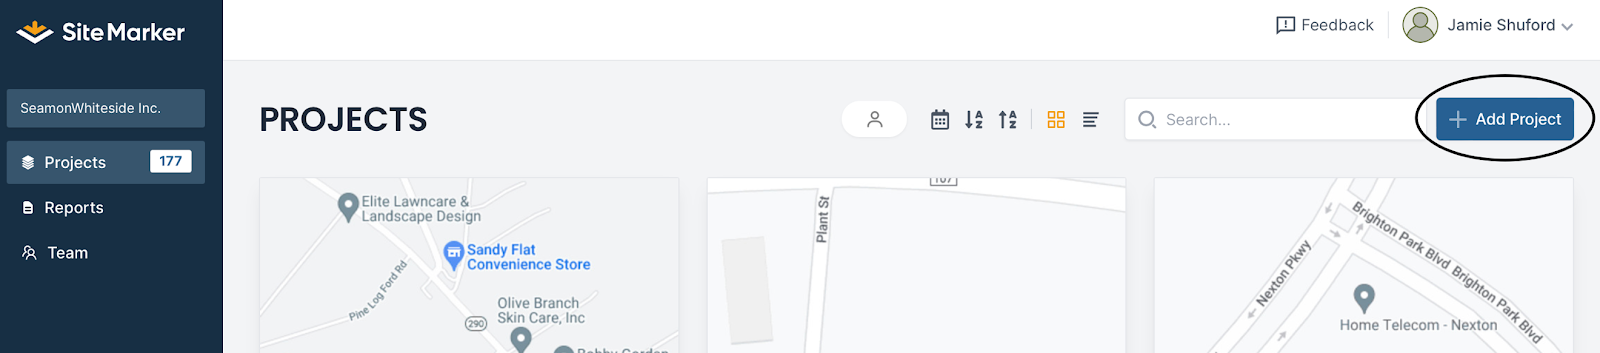
To start a project, go to the web admin page at app.sitemarker.com. Click the blue button“Add Project” button to begin.
Once you click the Add Project Button you will see:

Here you can add:
- Identifier - Add a short tag that is easy to note for future reference
- Name - what a longer name of the project might be
- Description - add the details needed for the project
In Advanced Settings:
Within the advanced settings dropdown, you will see options to add:
- Contract Start and End dates, this sets the timeline for when the contract is estimated to be done.
- Contract amount, this stores the amount a contract is valued at. This $ amount will only be visible to Admin and Owner permissions
At the bottom left of your screen you will see an area that says "Add Location", click and it will bring you here:

You will find three ways to set your location:
- Address Bar - on the left side you can type in the address you want to be the project location
- Use Current Location - on the right side of the screen you can select to use your location to set the project area
- Use Coordinates - next to the current location, if you do not have an address and want to use coordinates this is where you do so!
Whatever you pick will display a map to put an exact location as well:
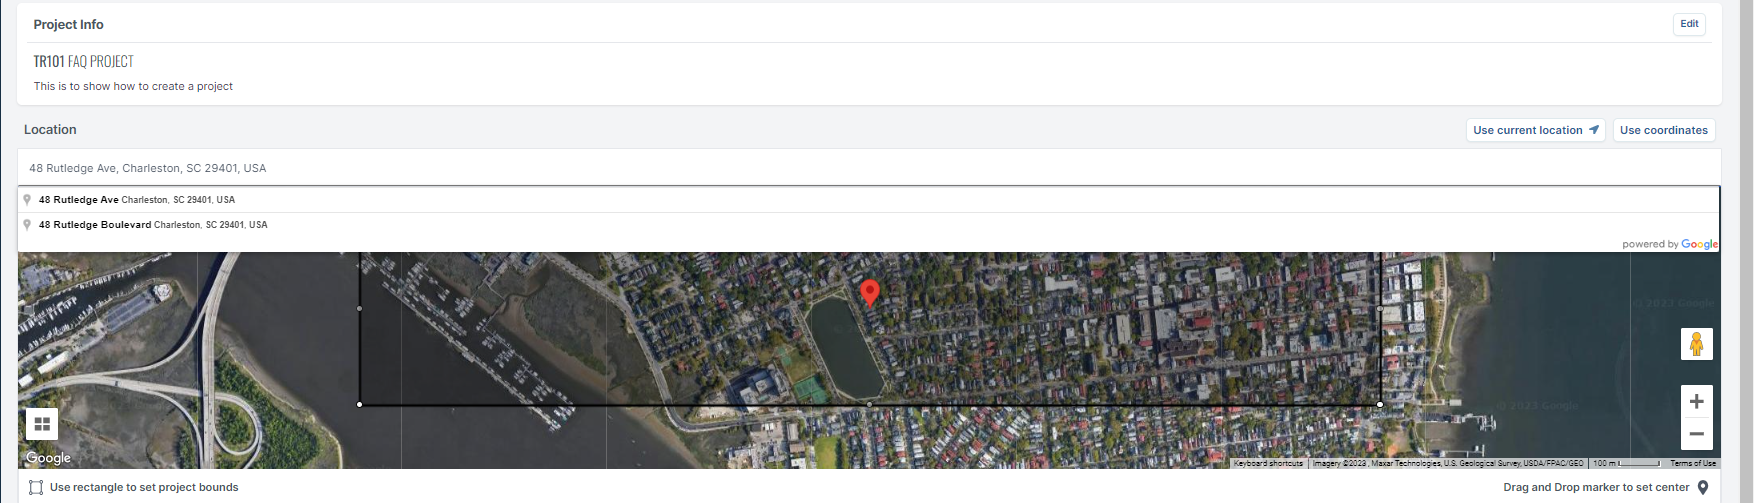
Here you can move the Yellow marker around to pick an exact location and move/change the rectangle to fit the project bounds.
At the bottom of the screen on the right-hand side, you will see a "Create Project" button. When you are ready to save click it!
Mobile Project Creation

When you Log into your Site Marker account on an empty workspace you will see the screen on the left. Click on the "Create Project" button to start the process
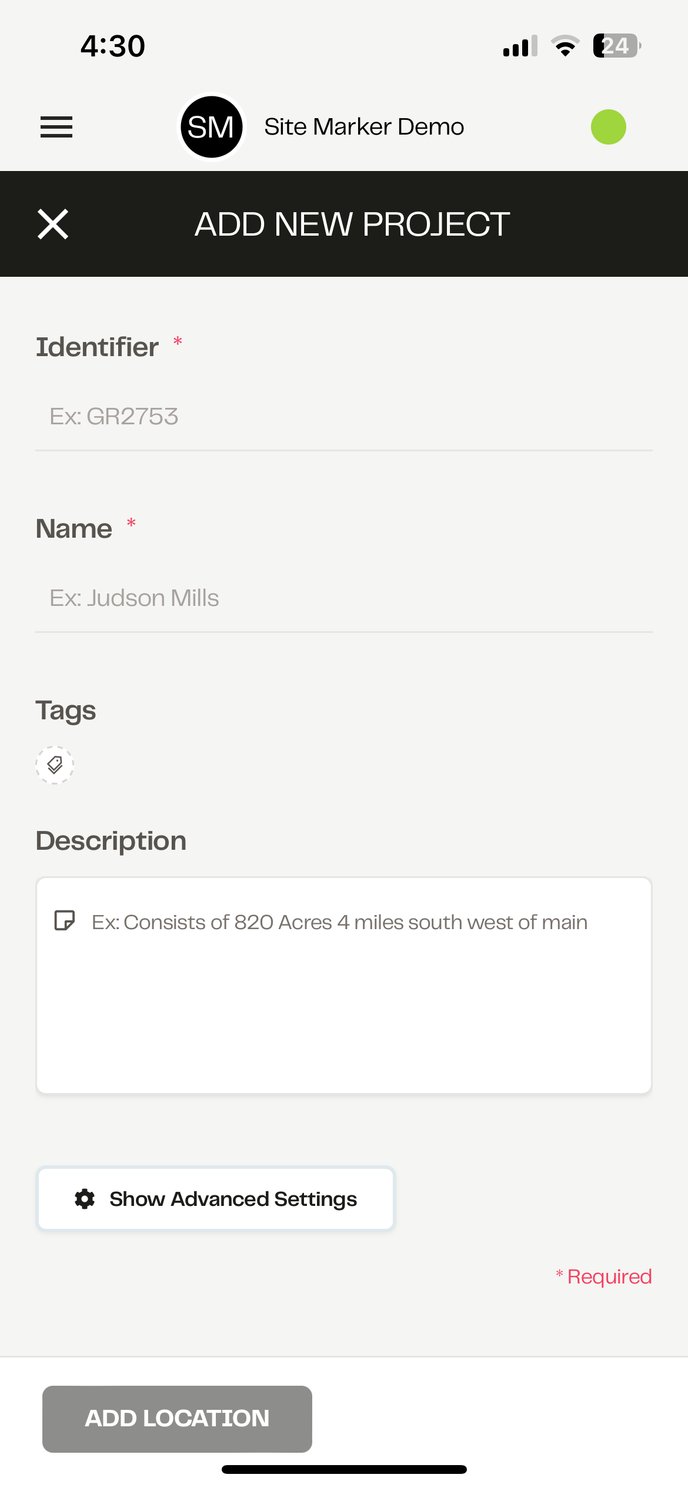
Here you can add:
- Identifier - Add a short tag that is easy to note for future reference
- Name - what a longer name of the project might be
- Description - add the details needed for the project
In Advanced Settings:
Within the advanced settings dropdown, you will see options to add:
- Contract Start and End dates, this sets the timeline for when the contract is estimated to be done.
- Contract amount, this stores the amount a contract is valued at. This $ amount will only be visible to Admin and Owner permissions
At the bottom left of your screen you will see an area that says "Add Location", click and it will bring you here:

You will find three ways to set your location:
- Address Bar - on the left side you can type in the address you want to be the project location
- Use Current Location - on the right side of the screen you can select to use your location to set the project area
- Use Coordinates - next to the current location, if you do not have an address and want to use coordinates this is where you do so!
Whatever you pick will display a map to put an exact location as well.
Here you can move the Neon Yellow marker around to pick an exact location and move/change the rectangle to fit the project bounds.
At the bottom of the screen on the right-hand side, you will see a "Create Project" button. When you are ready to save click it!